Managing Projects
Projects help you organize your renders by property, client, or any grouping you prefer.
Creating a Project
- From the projects page, click Create New Project.
- Enter a Project Name (required) - e.g., "123 Main Street" or "Client: Smith Residence".
- Optionally enter an Address - this helps the AI match rendering styles to the locale.
- Click Create.
Viewing Your Projects
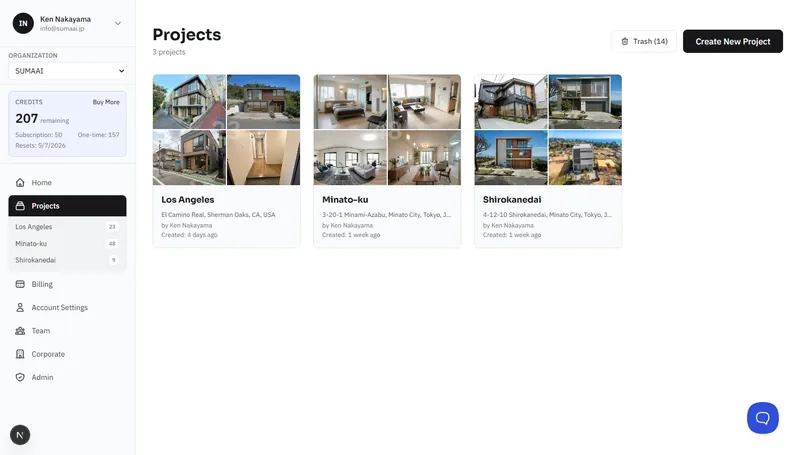
Navigate to Projects in the sidebar to see all your projects in a grid view. Each card shows:
- Project name
- Property address (if set)
- Number of runs
- Created date
- Creator name (useful for teams)
Inside a Project
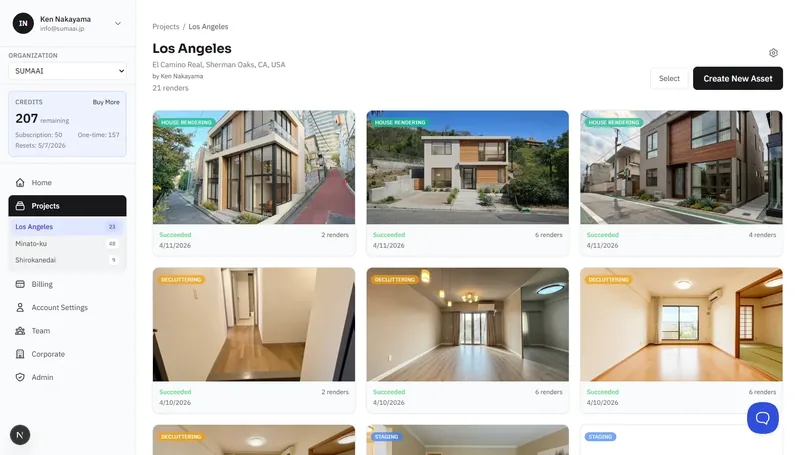
Click a project to open it. Here you'll find:
- Project info - name, address, creator, total renders
- Render grid - all runs (stagings, house renders, photo edits) within this project
- Status indicators - each run shows whether it succeeded, is running, or is queued
Creating New Assets
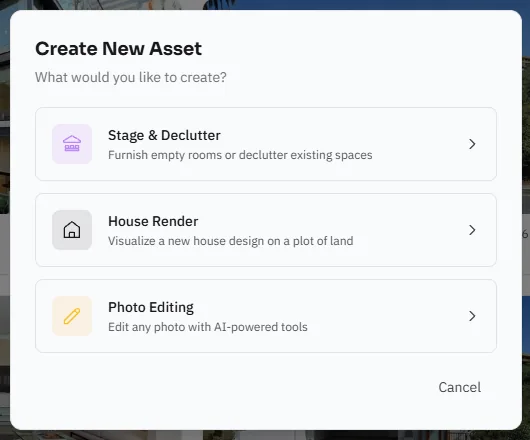
Inside a project, click Create New Asset and choose a workflow:
- Stage & Declutter - virtual staging and cleanup
- House Render - architectural rendering
- Photo Editing - AI-powered photo edits
See the individual guides for details:
Editing a Project
Click the gear icon in the top-right corner of the project page (available to the project owner) to update:
- Project name
- Address
Deleting a Project
- Open the project and click Delete.
- Type the project name to confirm.
- This will remove all included renders and the project itself.
If you removed a project by mistake, please reach out to our team.
Bulk Operations
Select multiple renders within a project to:
- Delete - remove selected renders
- Move - transfer selected renders to a different project