House Rendering
Generate architectural renders of buildings - either on an empty lot or by replacing an existing structure.
Watch a quick tutorial on House Rendering AI
Two Workflows
Empty Lot
Start with a photo of a vacant plot of land and generate a building design on it.
Existing Building
Start with a photo of a building you want to replace with a new design.
Empty Lot Workflow
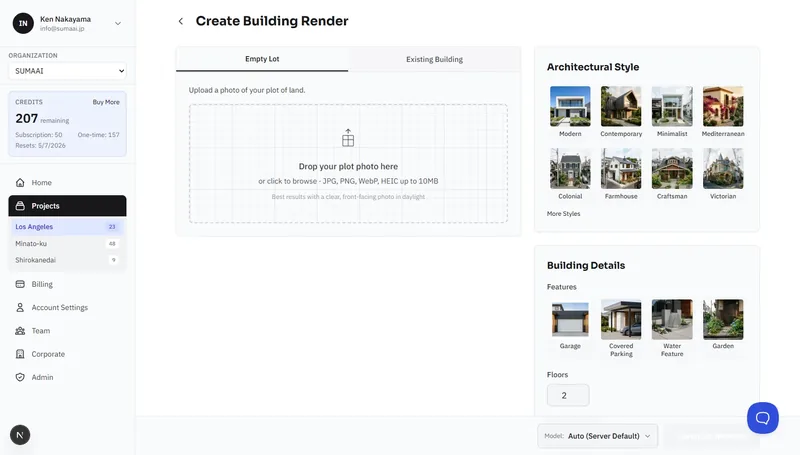
Step 1: Upload a Plot Photo
- In your project, click Create New Asset and select House Render.
- Choose Empty Lot.
- Drag and drop a photo of your plot, or click to browse.
- Formats: JPG, PNG, WEBP, HEIC
- Max size: 10 MB
- Best results: Clear, front-facing photo in daylight
Step 2: Analyze the Plot
Click Analyze Plot. The AI will detect the plot boundaries and display them as a blue outline on your photo.
Step 3: Adjust the Plot Diagram
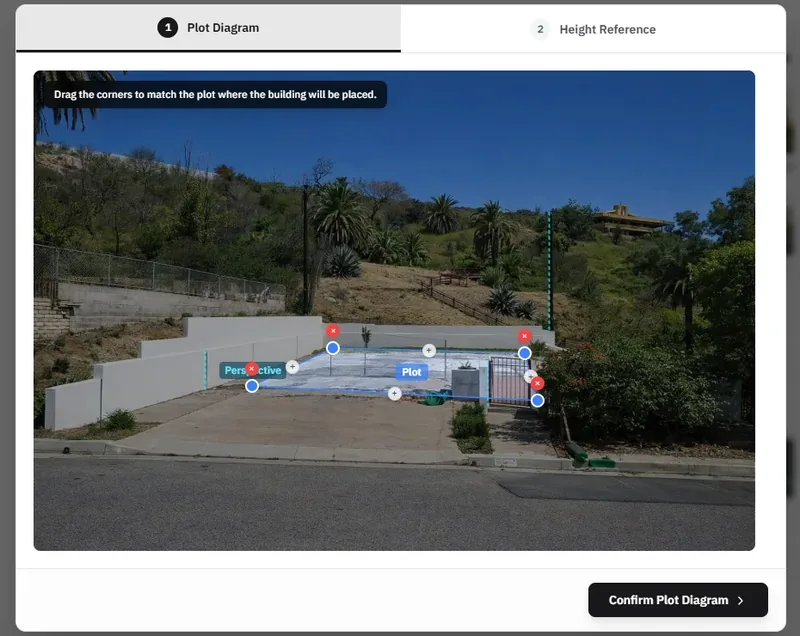
Fine-tune the plot boundary:
- Drag the blue corners to match the actual plot edges.
- Add a point to create more precise boundaries.
- Remove a point to simplify the shape.
Step 4: Set the Height Reference
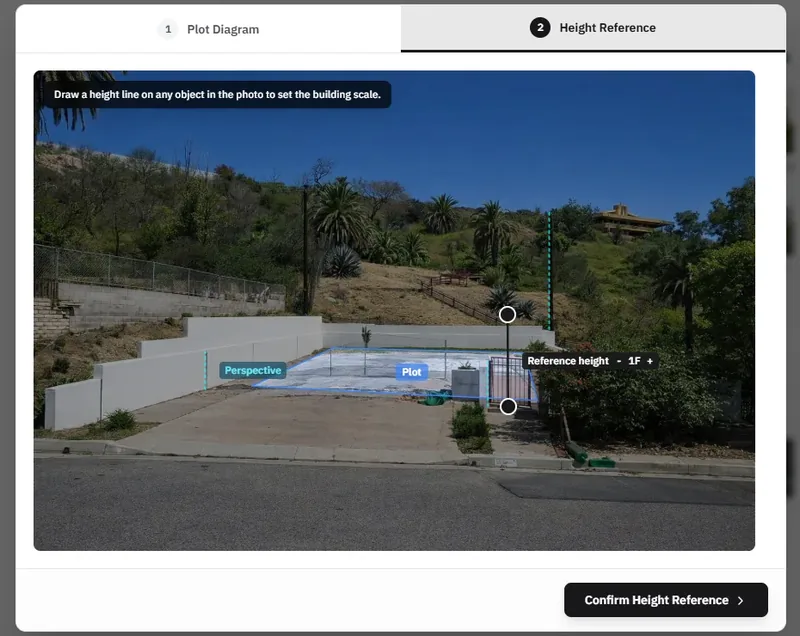
This tells the AI how tall to make the building relative to the surroundings:
- Drag the edges of the height reference line to an object on the screen that represents a known height, ideally a nearby building.
- Adjust its height until it represents a round number of floors.
- Use +/- to set how many floors the reference height line represents.
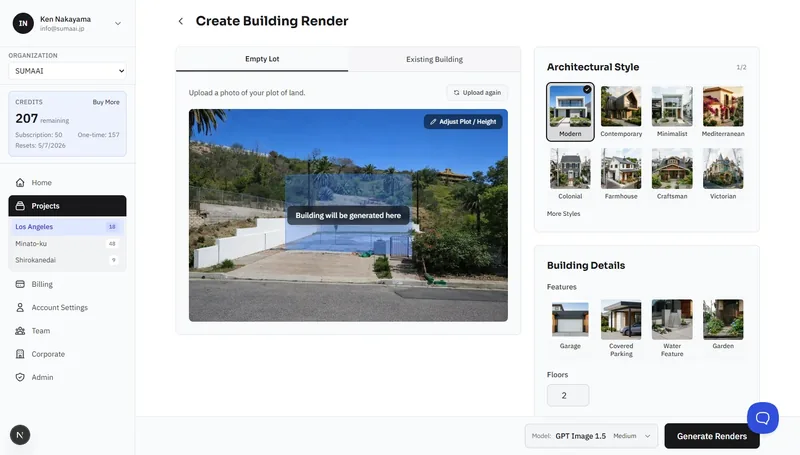
Step 5: Configure the Building
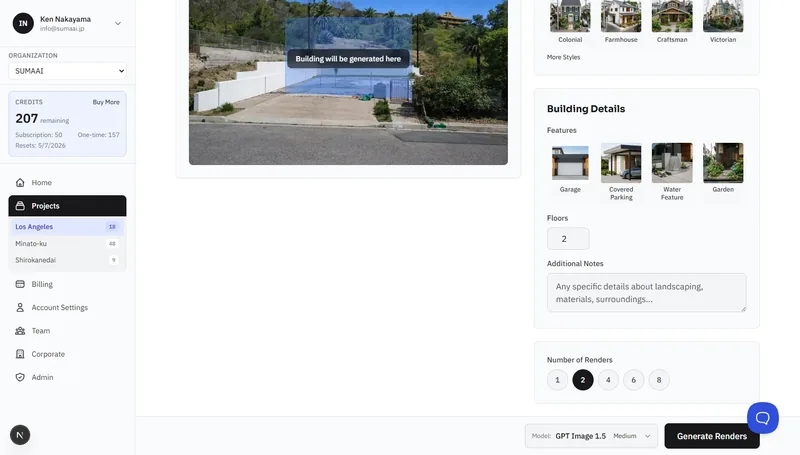
Choose your design preferences:
Architectural Style - pick from 16 styles:
| Style | Style | |
|---|---|---|
| Modern | Colonial | |
| Contemporary | Farmhouse | |
| Minimalist | Craftsman | |
| Mediterranean | Victorian | |
| Brutalist | Art Deco | |
| Mid-Century Modern | Industrial | |
| Japandi | Coastal | |
| Scandinavian | Tropical Modern |
Features - toggle optional elements:
- Garage
- Covered Parking
- Water Feature
- Garden
Floors - set the number of stories.
Address - optionally provide the property address (helps the AI match local architectural conventions).
Additional Notes - free text for specific requests like materials, landscaping, or surroundings.
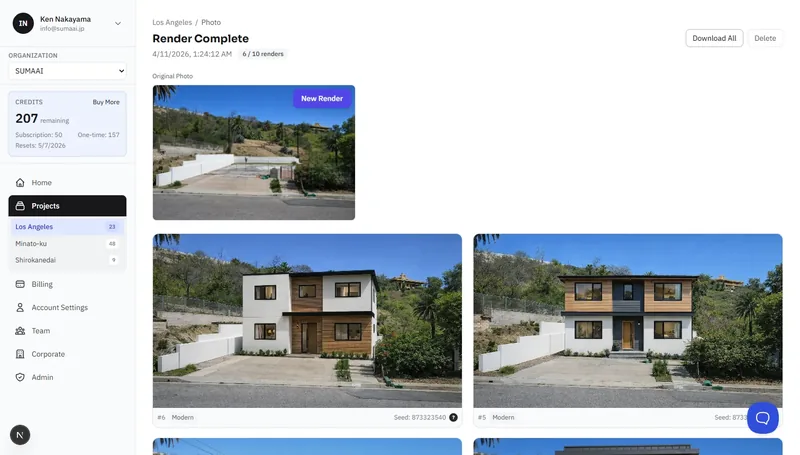
Step 6: Generate
- Set the Number of Renders (1–8, depending on your plan).
- Click Generate Renders.
Existing Building Workflow
Step 1: Upload a Building Photo
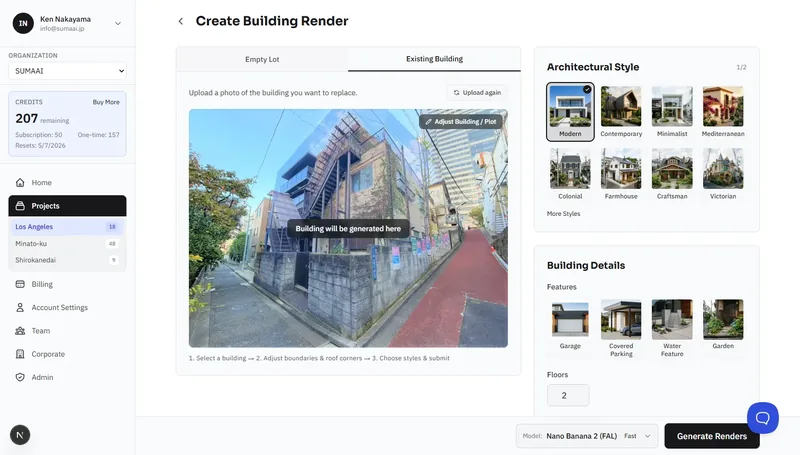
- Choose Existing Building.
- Upload a photo of the building you want to replace.
Step 2: Detect Buildings
Click Detect Buildings. The AI identifies buildings in your photo and highlights them with colored polygons. Each detected building shows its estimated floor count.
Step 3: Define the generation area
To define the area the building will be generated in, you go through three steps:
Tab 1: Select Building
Click on the detected building you want to replace. The selected building's outline and plot boundary will be displayed based on AI analysis.
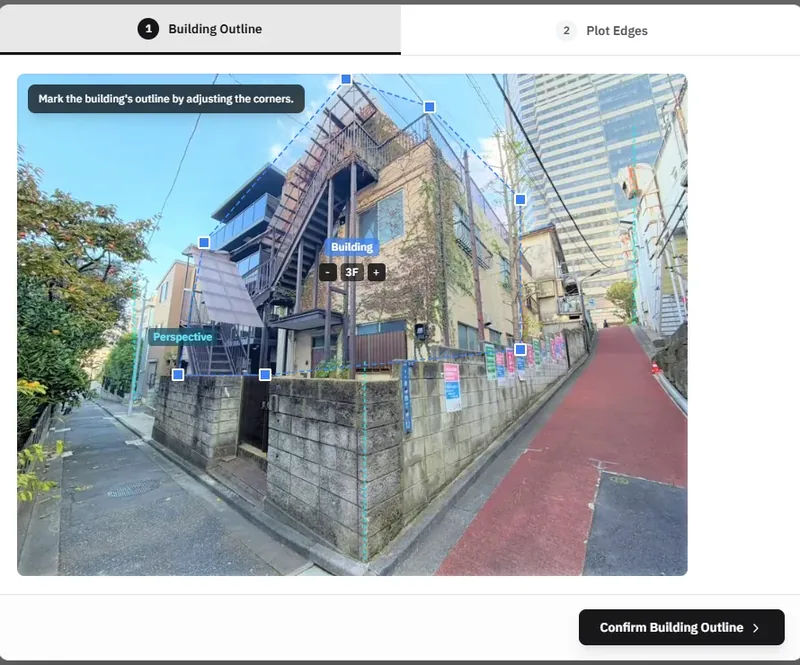
Tab 2: Building Outline
Adjust the building outline:
- Drag the blue squares at each corner to match the building's actual edges.
- Use the +/− buttons in the center to set the number of floors the current building has.
- Click Confirm Building Outline to proceed.
Tab 3: Plot Edges
Define the full plot area, extending from the existing building's outline:
- Drag the green circles to mark the plot boundary extending from the building.
- Use + buttons at edge midpoints to add extra corners for irregular plots.
- Use × buttons above corners to remove them (minimum 3 corners).
- Click Confirm Plot Edges to finish.
Building volume preview
After confirming the plot and building outline, a 3D building volume preview appears on the photo. If you need to make adjustments, click on "Adjust building / plot" in the top-right corner of the photo.
Step 4: Configure and Generate
Same configuration options as the empty lot workflow - choose a style, features, floors, and notes, then click Generate Renders.
Tips for Best Results
- Front-facing angles - the AI works best with straight-on building views.
- Set the height reference carefully - this directly affects the scale of the generated building.
- Include an address - the AI can adapt the design to match the locale.
- Use notes for specifics - mention materials ("white stucco"), landscaping ("palm trees"), or context ("corner lot with ocean view").
- Generate then adjust - examine the result after generation - if the shape, scale or perspective is incorrect, click on "New Render" and use the "Adjust building / plot" option to refine, building and plot boundaries and number of floors.