Getting Started
This guide walks you through creating an account, logging in, and generating your first virtual staging.
Creating an Account
- Visit the Virtual Staging ART website and click Get Started.
- Fill in your details:
- Name - your display name
- Company Name - your business or organization
- Email - used for login and notifications
- Password - must be at least 10 characters
- Click Sign Up.
You can also sign up with your Google account for one-click registration.
Team Invites
If someone invited you to their team, use the invite link from your email. Your email will be pre-filled and you'll automatically join their organization after signing up.
Logging In
- Enter your email and password, then click Log In.
- Alternatively, click Sign in with Google.
Two-Factor Authentication
If you've enabled 2FA on your account, you'll see a second step after entering your password:
- Enter the 6-digit code from your authenticator app, or
- Enter one of your 8-character backup codes.
- Optionally check Trust this device for 30 days to skip 2FA on this device.
Forgot Password
- Click Forgot password? on the login page.
- Enter your email address.
- Check your inbox for a reset link.
- Click the link and set a new password (minimum 10 characters).
Your Dashboard
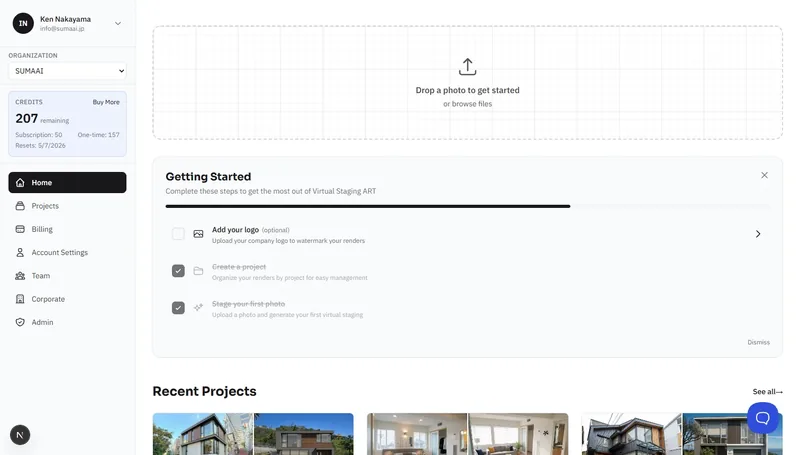
After logging in, you'll land on your dashboard. Here's what you'll see:
Quick Upload
Drag and drop a photo anywhere on the dashboard to start a new render immediately. You'll be prompted to select or create a project.
Activity Feed
- Activity - a timeline of your recent activity (stagings, cleanups, house renders)
- Recent Renders - thumbnail previews of your latest results
Recent Projects
Your most recent projects appear as cards showing the project name, address, creator, and number of runs. Click See all to view your full project list.
Your First Virtual Staging
Here's the quickest way to get a result:
- Navigate to Projects and click Create New Project.
- Give it a name (e.g., "123 Main Street") and optionally add the property address.
- Inside your new project, click Create New Asset and select Stage & Declutter.
- Drag and drop an interior photo (JPG, PNG, WebP, or HEIC - up to 10 MB).
- Choose a staging mode - for a furnished room, pick Clean Up + Stage.
- Select a style (e.g., Modern, Scandinavian) and room type (e.g., Living Room or Living / Dining / Kitchen (LDK)).
- Click Generate Staging.
- Watch the progress bar - your results will appear in under a minute.
- Browse your variations, compare with the original, and download your favorite.
That's it! You've created your first virtual staging. Read the Virtual Staging guide for full details on all options.