AI 2D to 3D Floor Plan Converter
Turn flat floor plans, scans, sketches, and listing layouts into furnished top-down 3D floor plan visuals for real estate marketing.
Upload the plan you already have, clean the linework when needed, then add furniture, flooring, fixtures, and material cues so buyers can understand the space faster.

From rough plan to buyer-ready 3D visual
The product is not just a filter on a floor plan. It combines cleanup, layout-preserving preparation, and furnished top-down 3D generation so the plan can work as a listing visual.
- 01
Upload
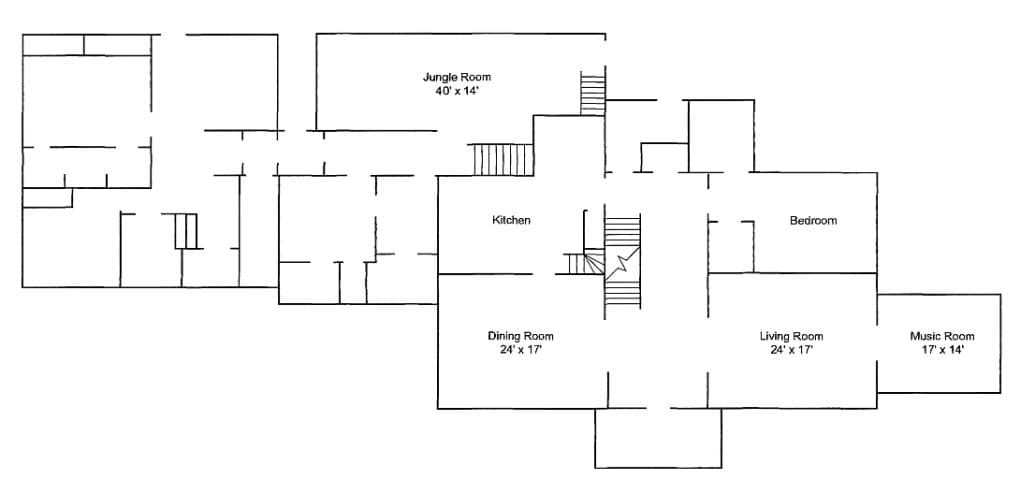
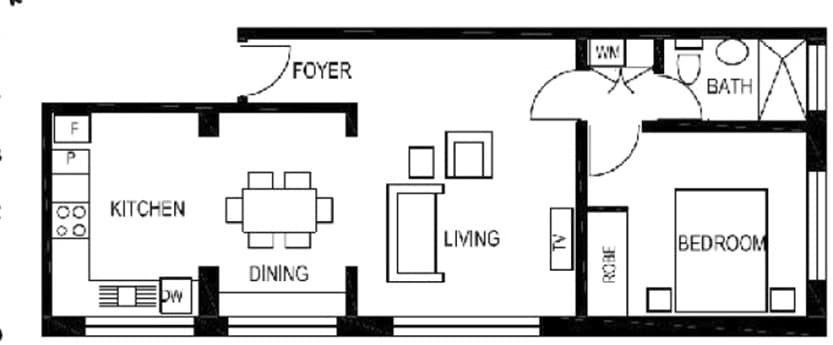
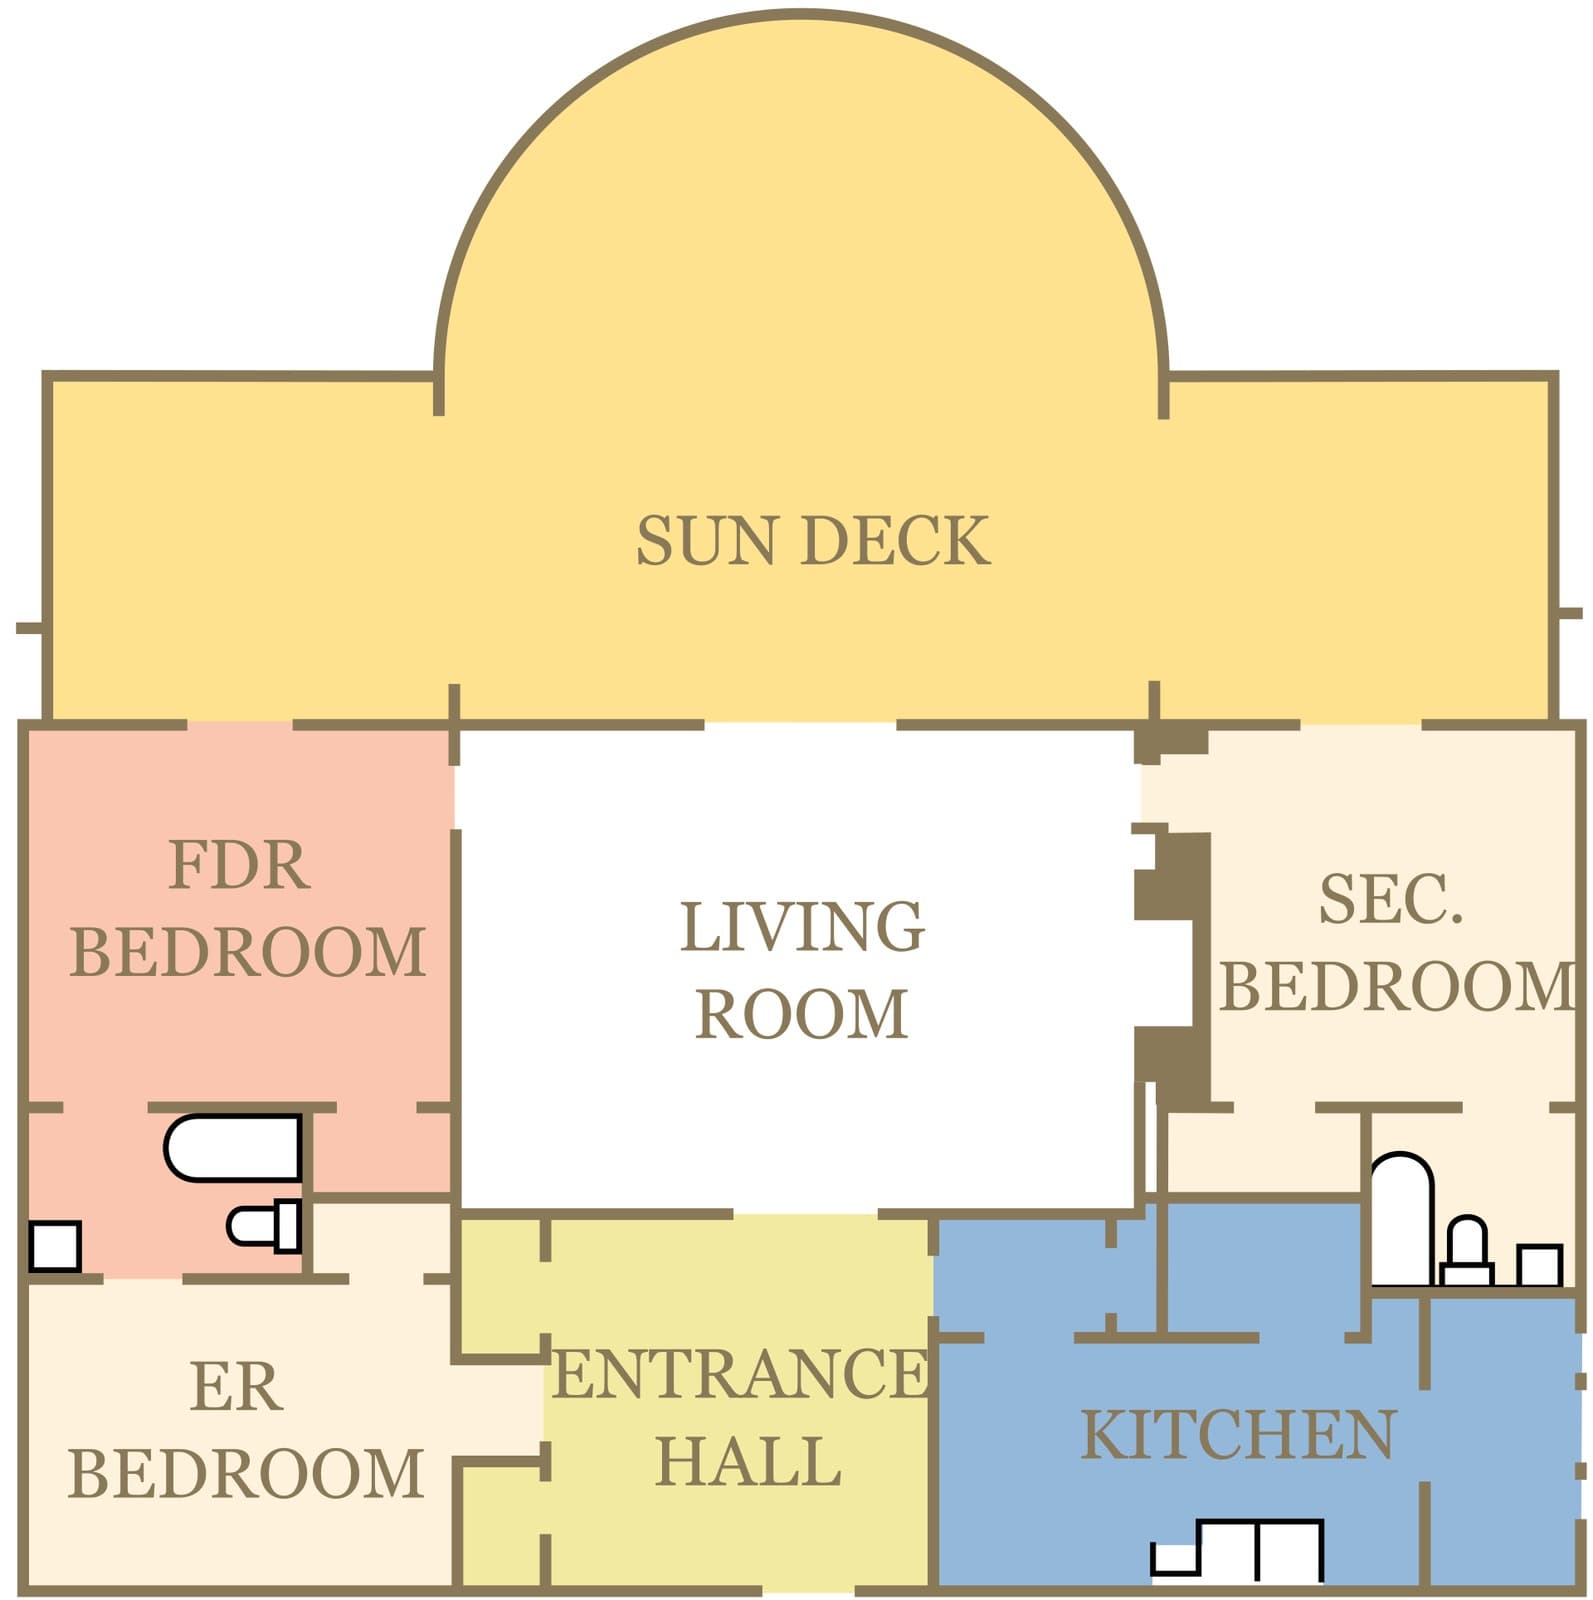
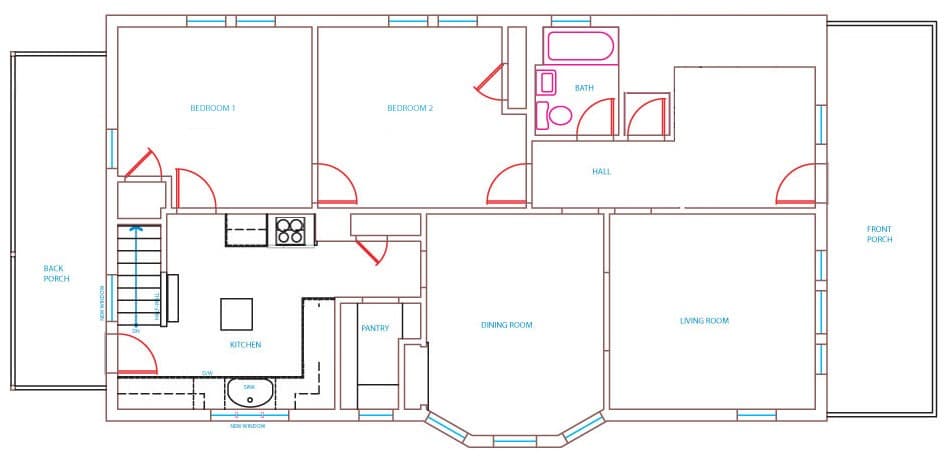
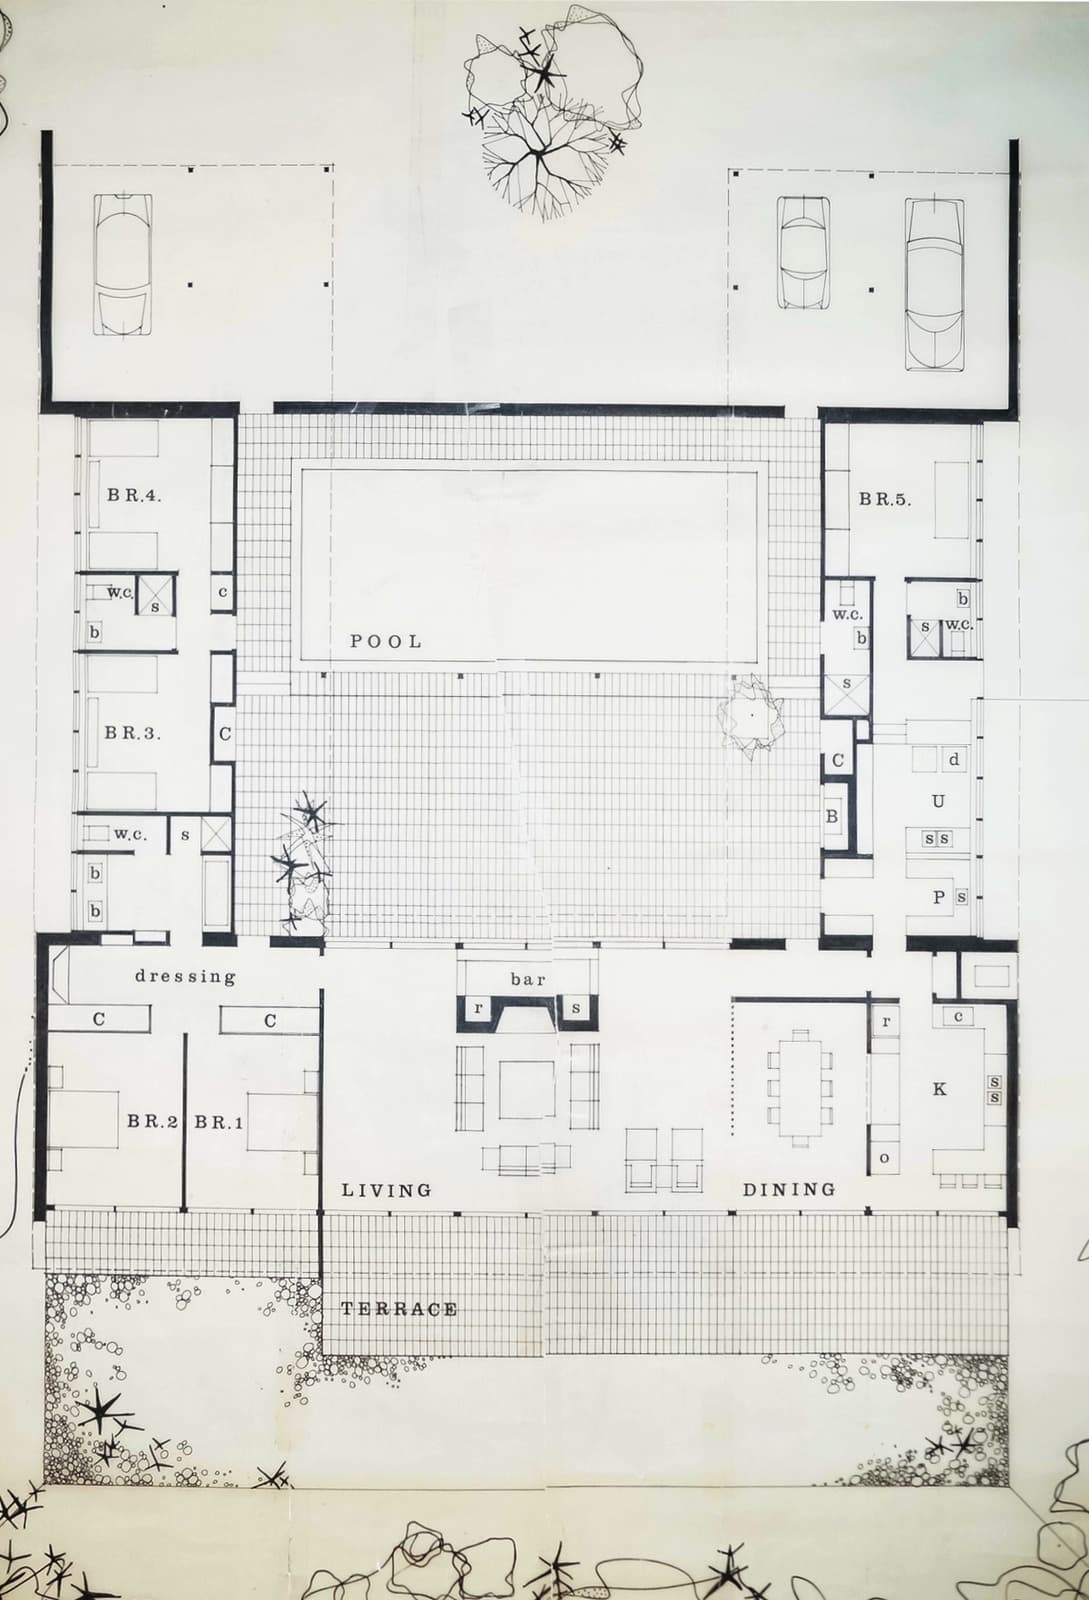
Start with any usable 2D plan
Use a scan, screenshot, sketch, exported layout, or older listing floor plan.
- 02
Prepare
Clean the plan before conversion
Preserve or remove labels and measurements, then reduce visual noise.
- 03
Convert
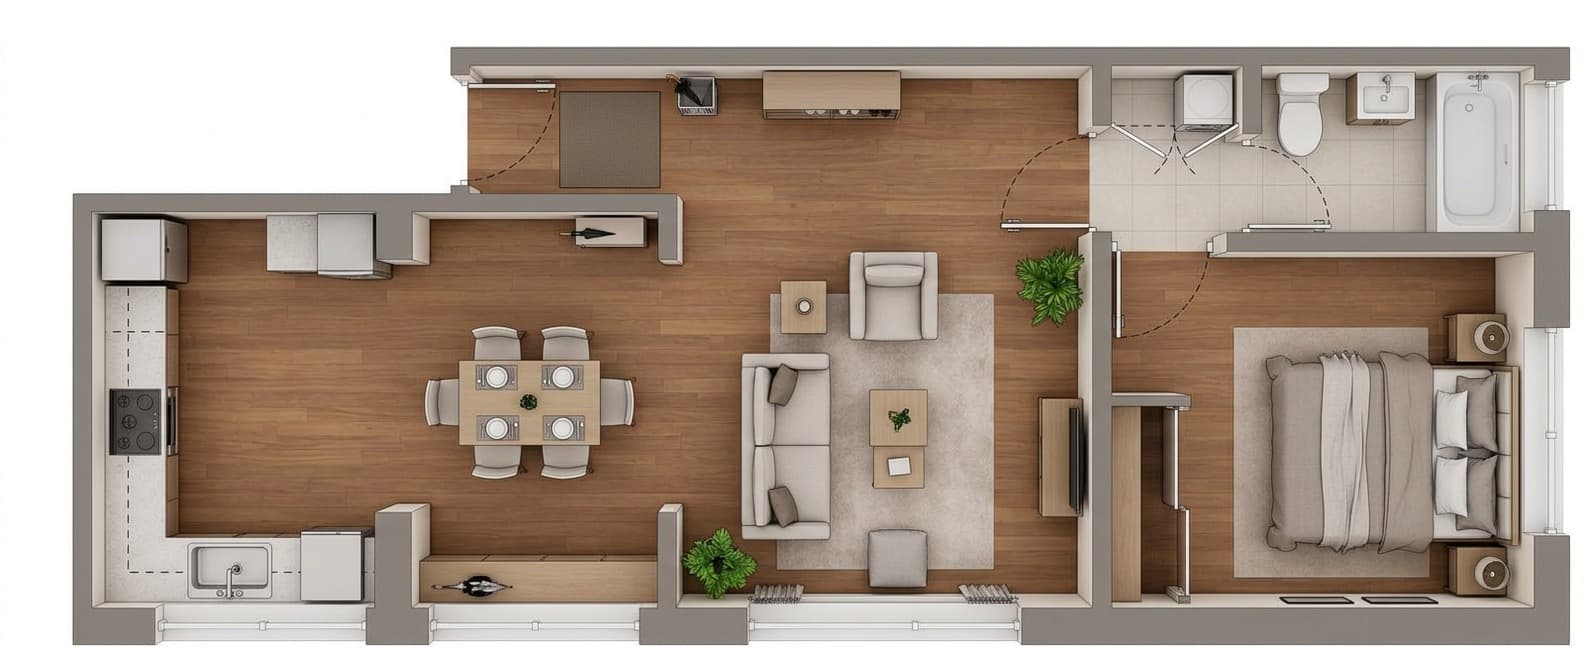
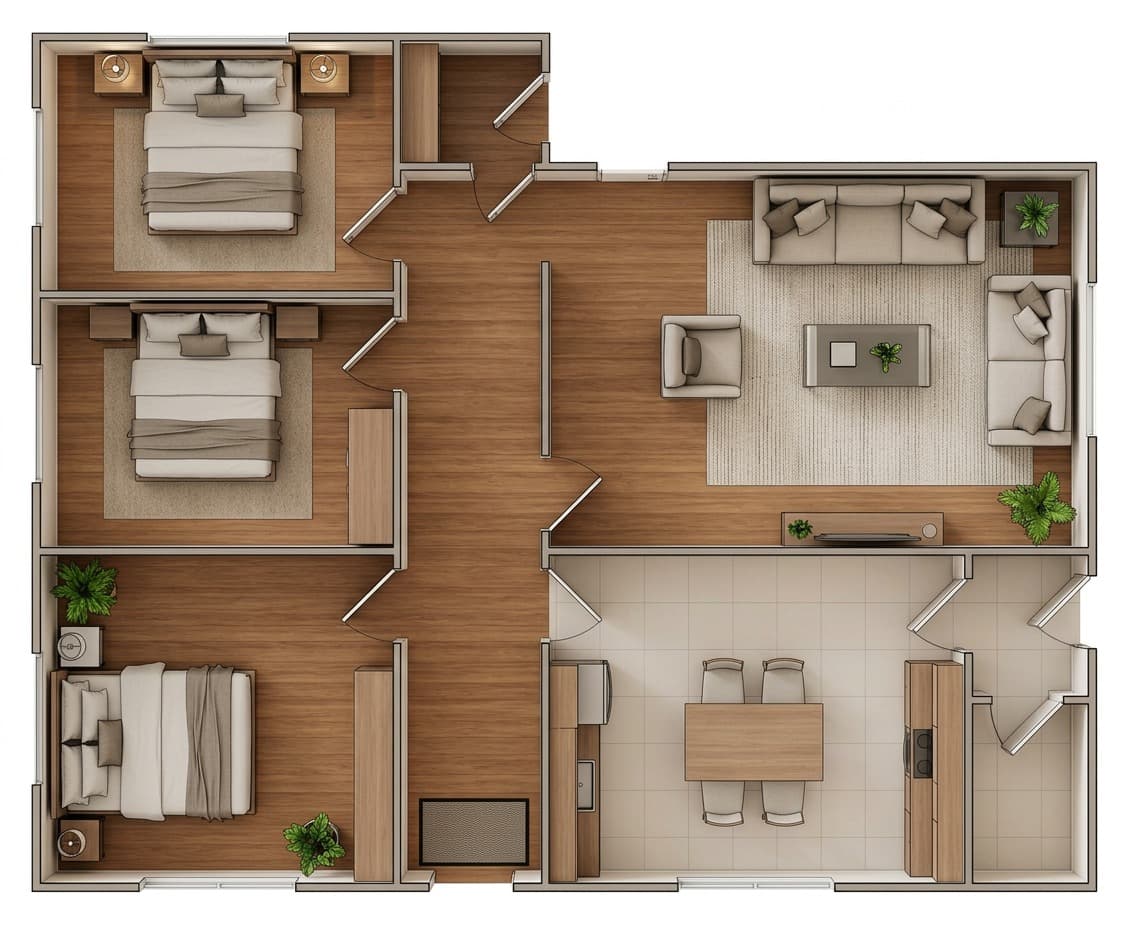
Generate a furnished 3D visual
Add furniture, flooring, fixtures, and material cues for listing use.
Bring Flat Floor Plans To Life
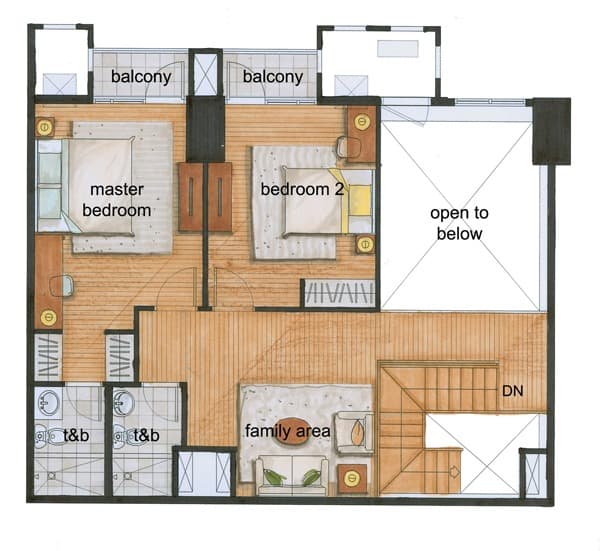
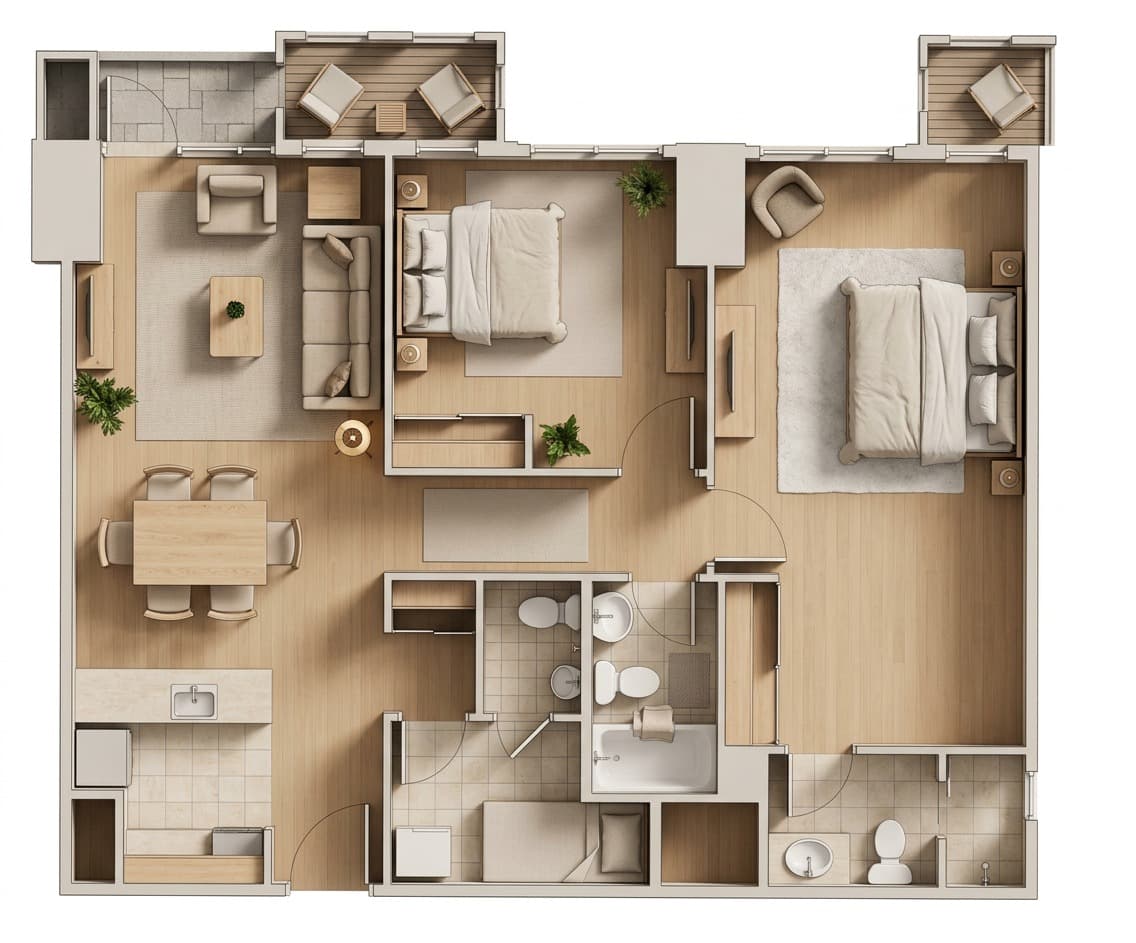
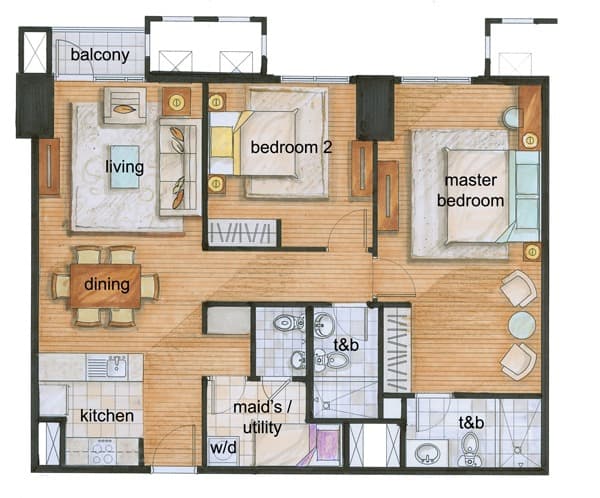
Top-down view of an entire staged apartment
Show the full layout as a furnished top-down 3D plan so buyers can understand room flow, scale, and how the home lives.
Unreadable plans become clear listing resources
Clean rough scans, screenshots, low-contrast drawings, and old marketing plans into polished visuals that belong in a listing gallery.
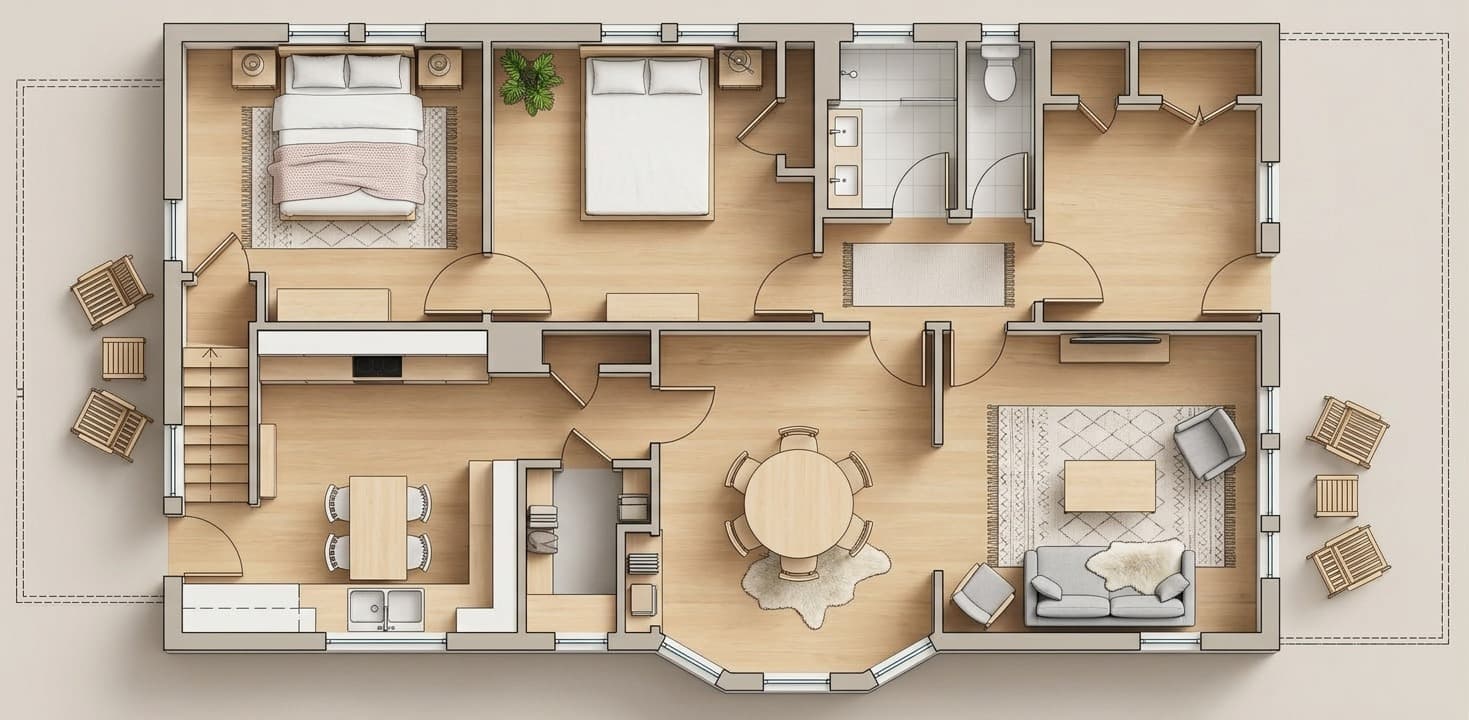
8 different styles
Match the floor plan visual to the property with style options that support modern, warm, minimal, and more fully staged listing looks.
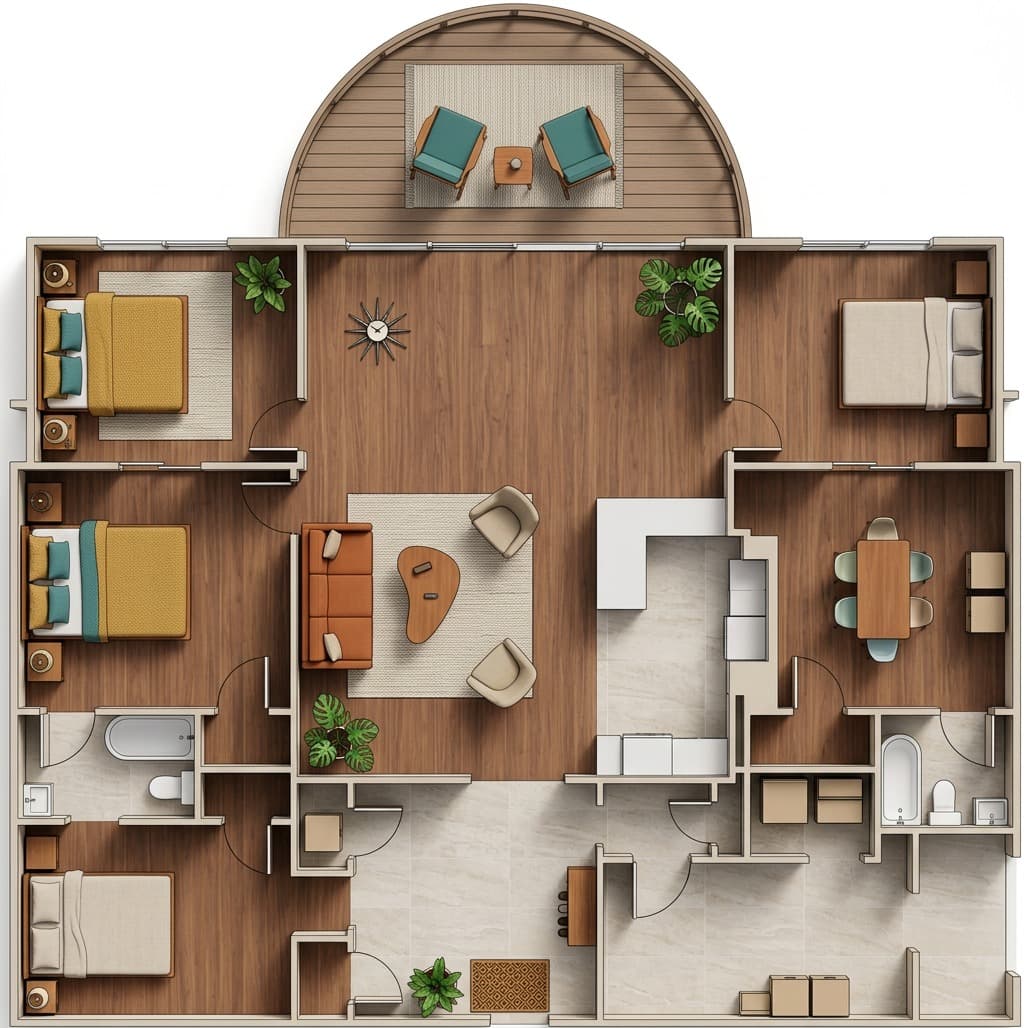
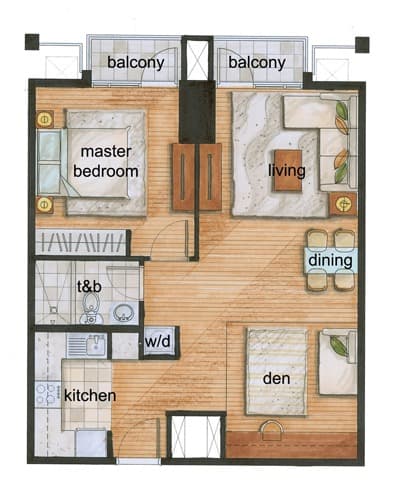
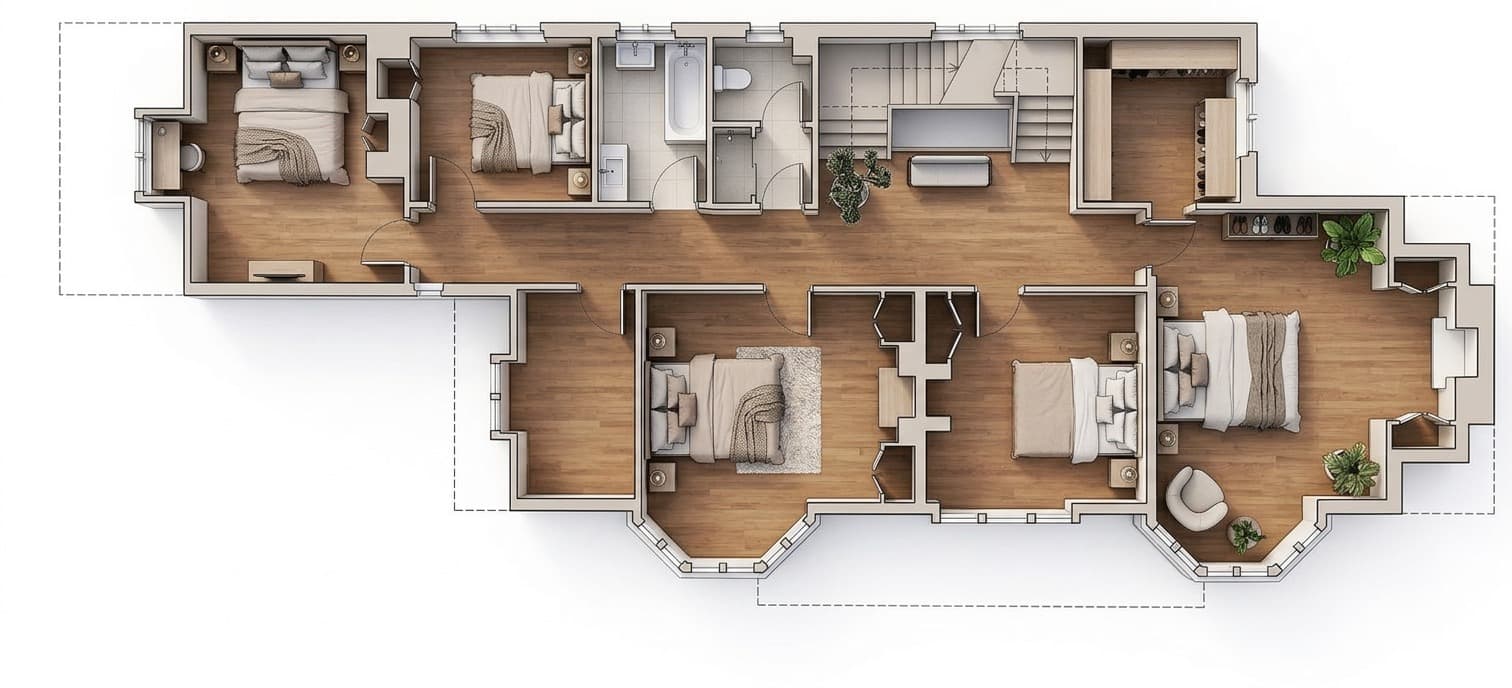
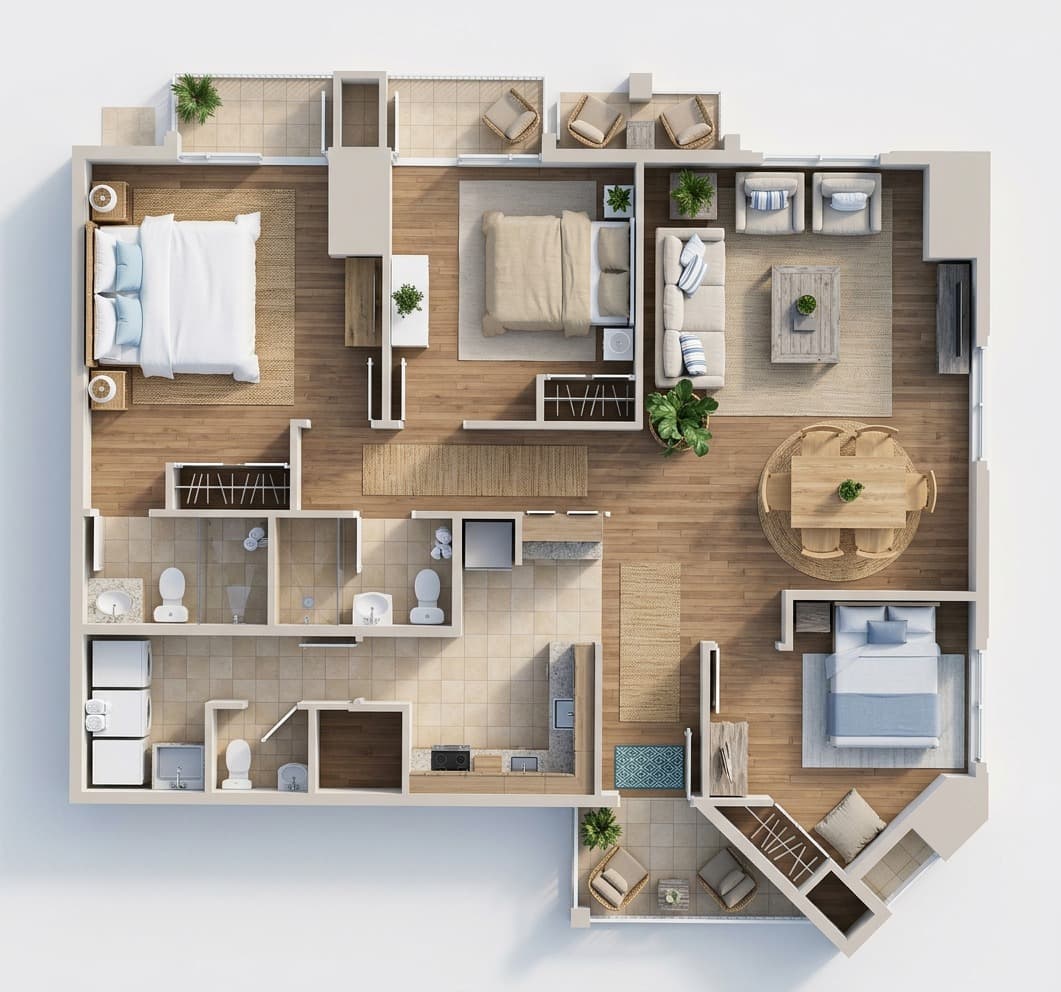
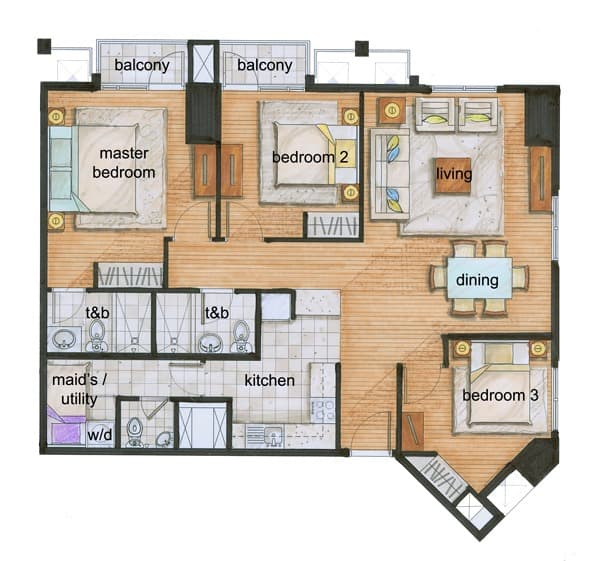
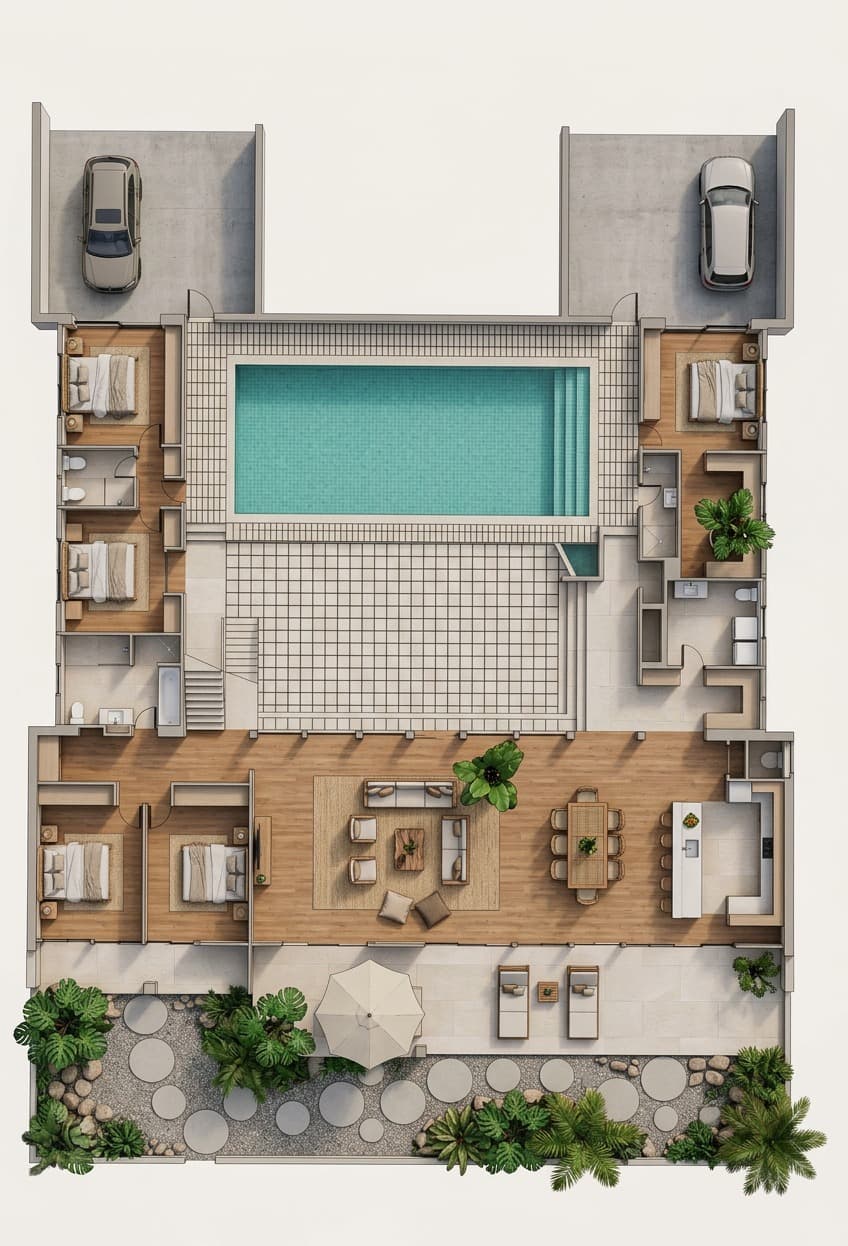
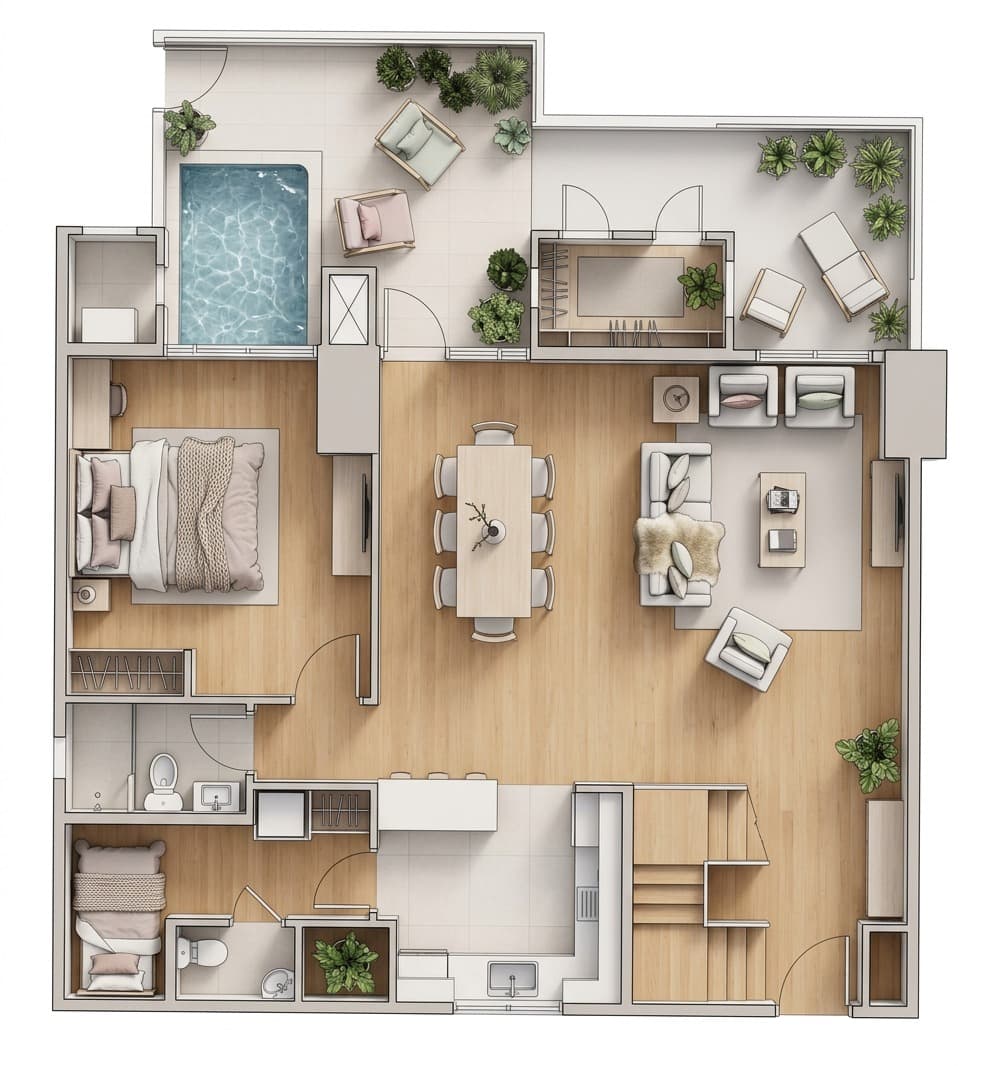
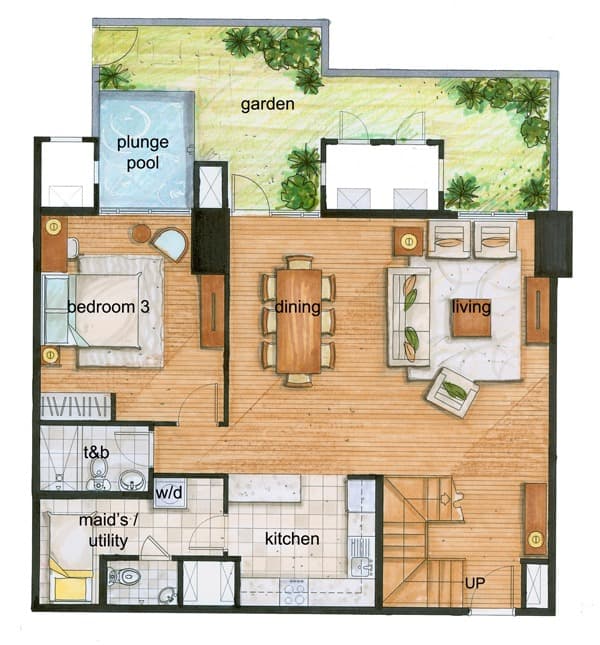
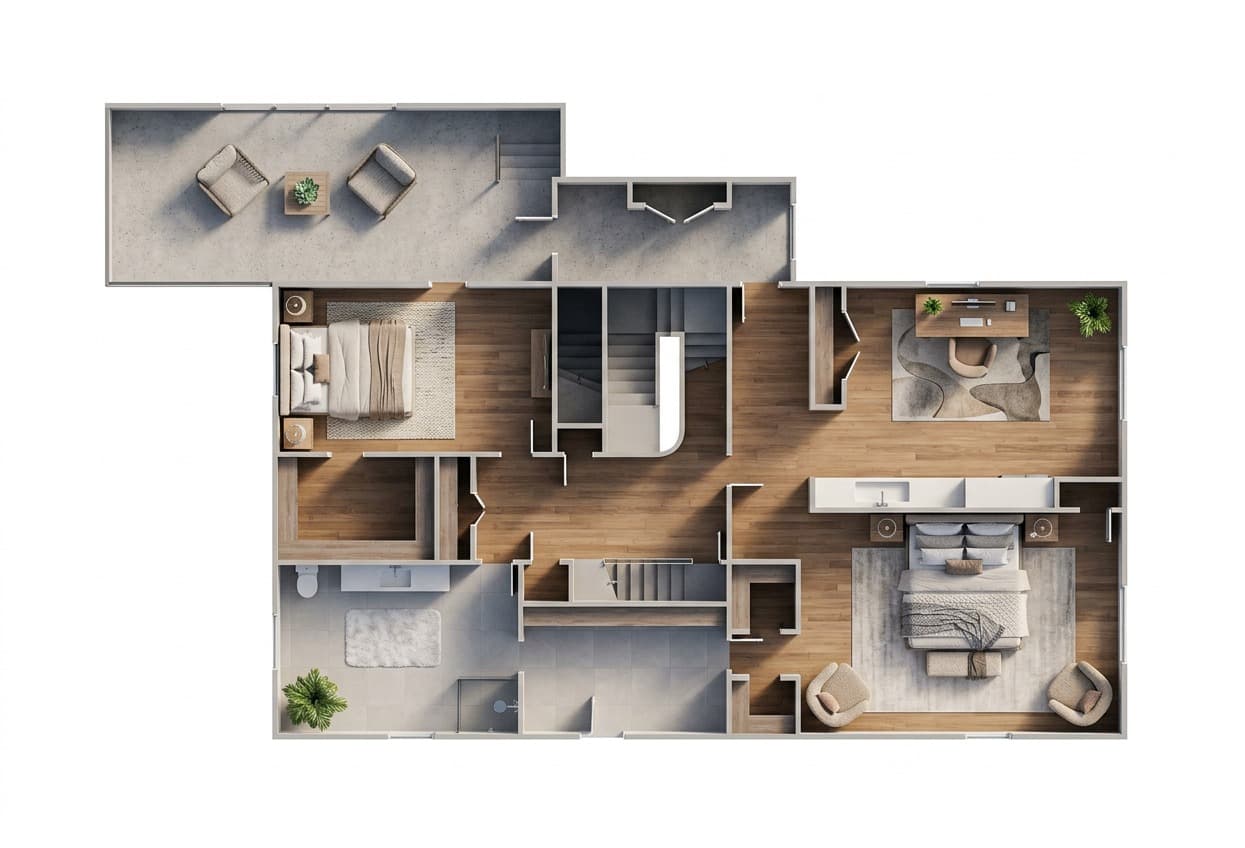
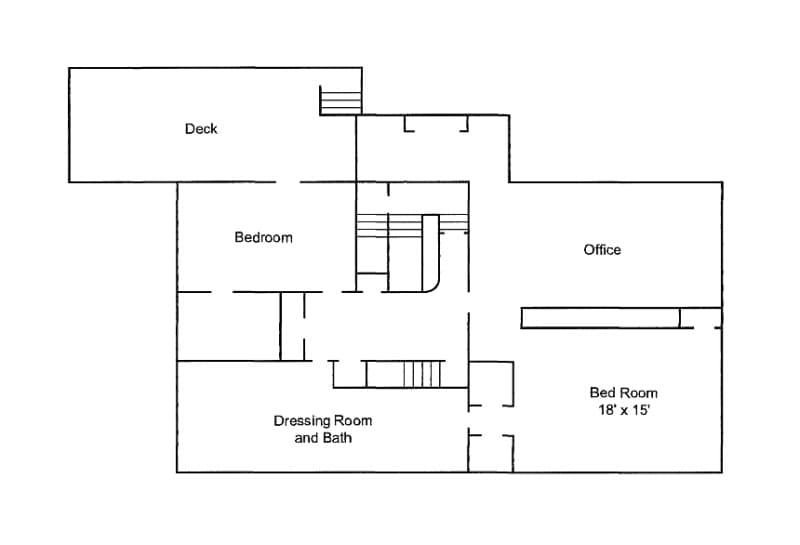
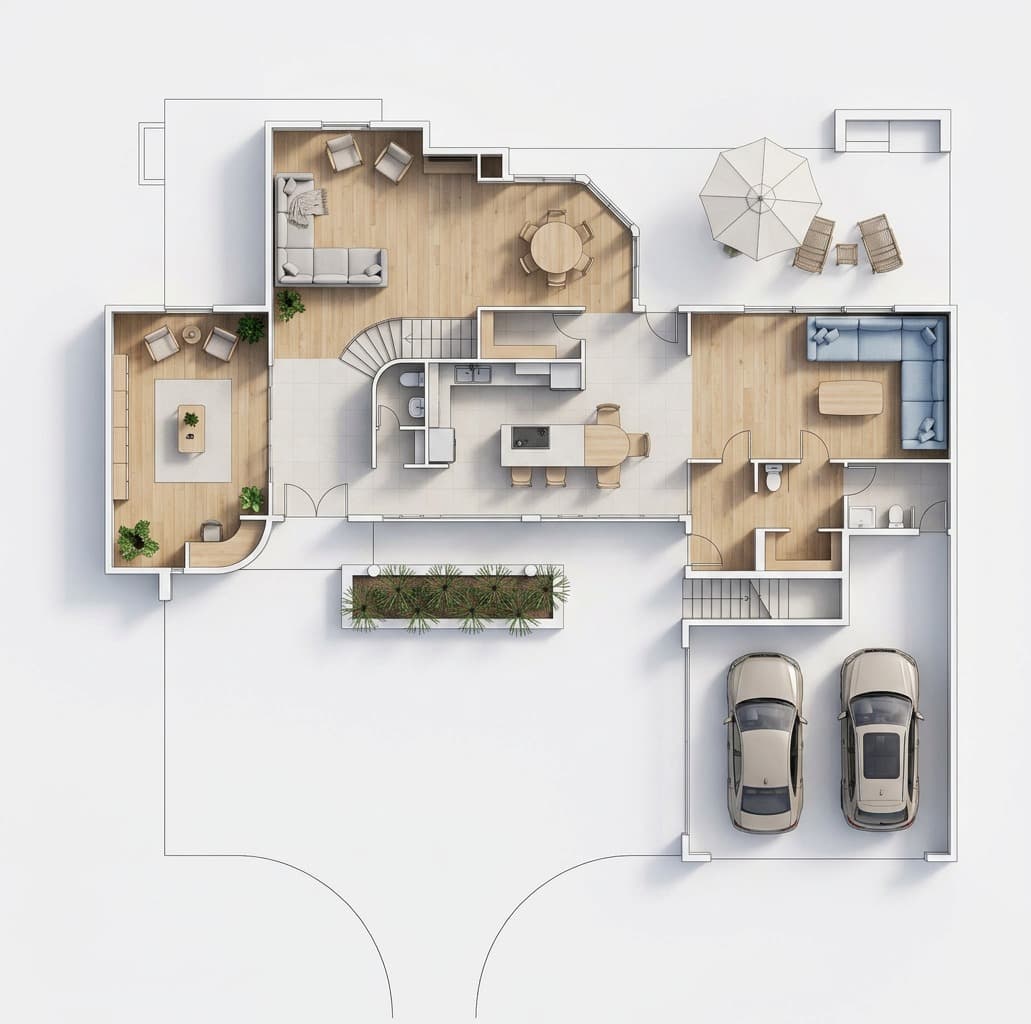
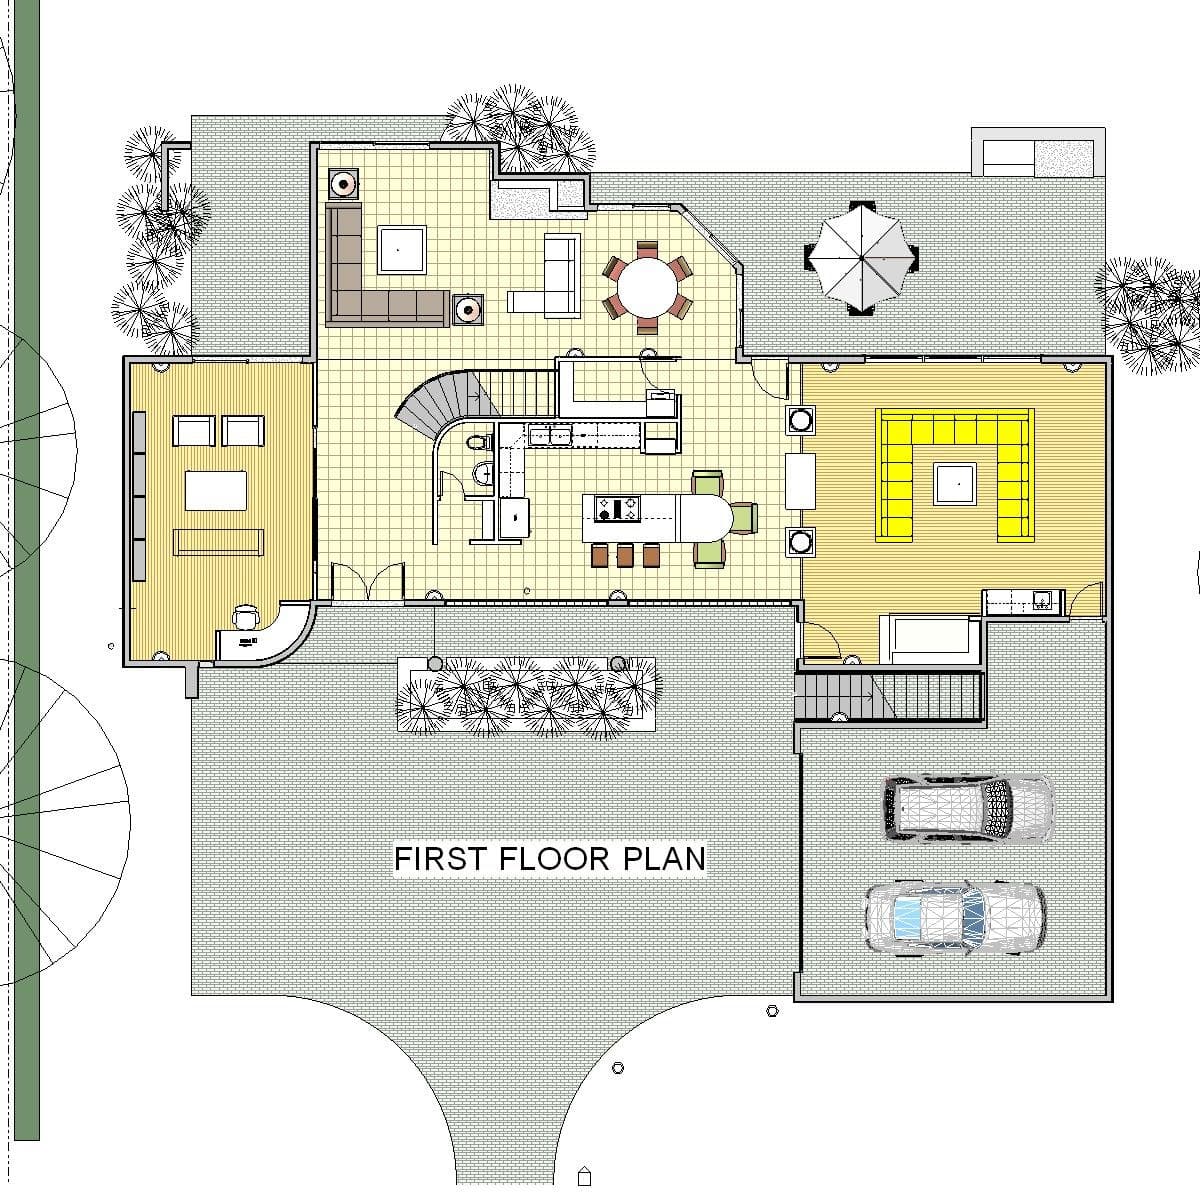
3D Rendered Floor plans examples
Fits any kind of listing, from small studios to multi floor houses, and 8 different staging styles
- 01

- 02
- 03
- 04
- 05
- 06

- 07
- 08
- 09
- 10
- 11
- 12
Frequently asked questions
What is a 2D to 3D floor plan converter?
A 2D to 3D floor plan converter turns an existing flat floor plan into a more visual top-down 3D floor plan with furniture, flooring, fixtures, and material cues for real estate marketing.
Is this an isometric or dollhouse floor plan?
No. This page is for top-down 3D floor plan visuals, not angled isometric or dollhouse models. The result is designed for listing galleries where buyers need a clear, easy-to-read view of the property layout.
Does this create a new architectural floor plan from scratch?
No. This page is for converting an existing floor plan image into a 3D marketing visual. It is not a CAD drafting tool and should not be used as the source of legal measurements, construction drawings, or code-compliance documents.
Can I remove labels or measurements from a floor plan?
Yes. The floor plan workflow includes options to preserve labels, remove labels, preserve measurements, or remove measurements before generating the 3D visual. Results should still be reviewed before publication, especially when source scans are low quality.
Can the tool stage a floor plan with furniture?
Yes. The 3D floor plan output can include furniture and material cues. The goal is to help buyers understand room function and flow, not to replace measured architectural drawings.
Is a 3D floor plan suitable for MLS or real estate portals?
A 3D floor plan can be used as a marketing image when it accurately represents the property and follows your local portal, MLS, and brokerage rules. Always verify dimensions and disclose AI-generated or illustrative visuals where required.

Give buyers a floor plan they can actually picture
Start free. Upload a 2D plan and create your first top-down 3D floor plan visual.
Convert A Floor Plan Free